Follow these steps to set up and use your Private Studio Link in Boomcaster:
Step 1: Activate Your Private Studio Link
- In Boomcaster, locate the Studio Dropdown at the top left of your dashboard.
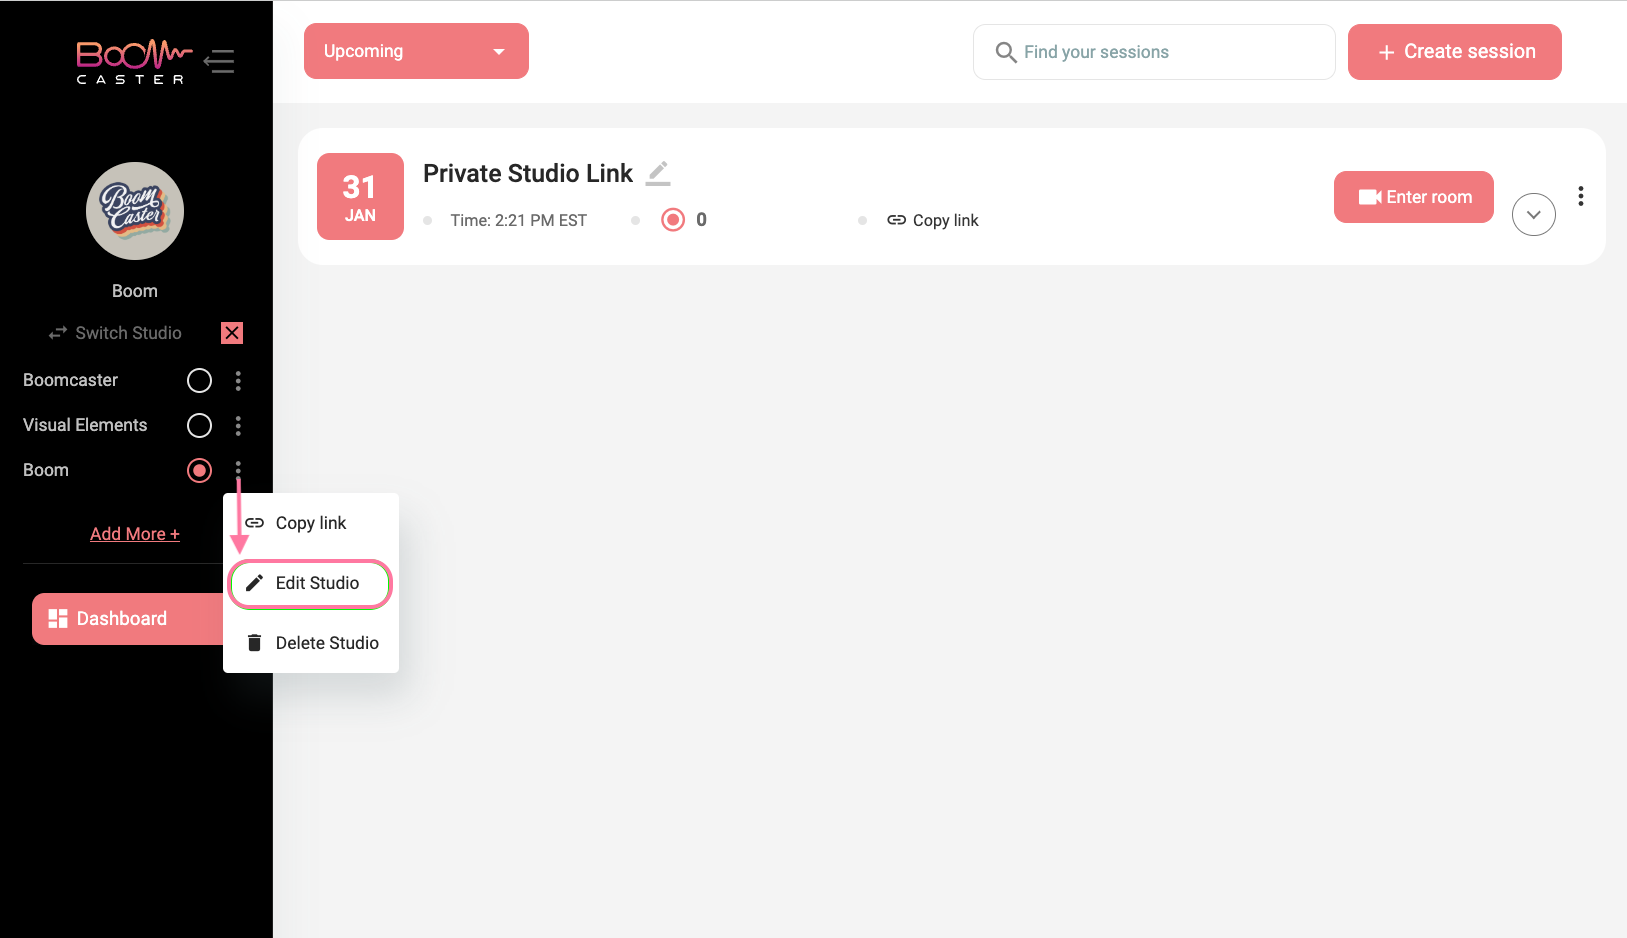
- Select the studio you want to edit from the dropdown.
- Click the three dots next to the studio name to open the options menu.
- From the menu, select Edit Studio.
- Add the Studio Name you want to use for your private link. This will create a unique, public-facing link for your virtual studio.
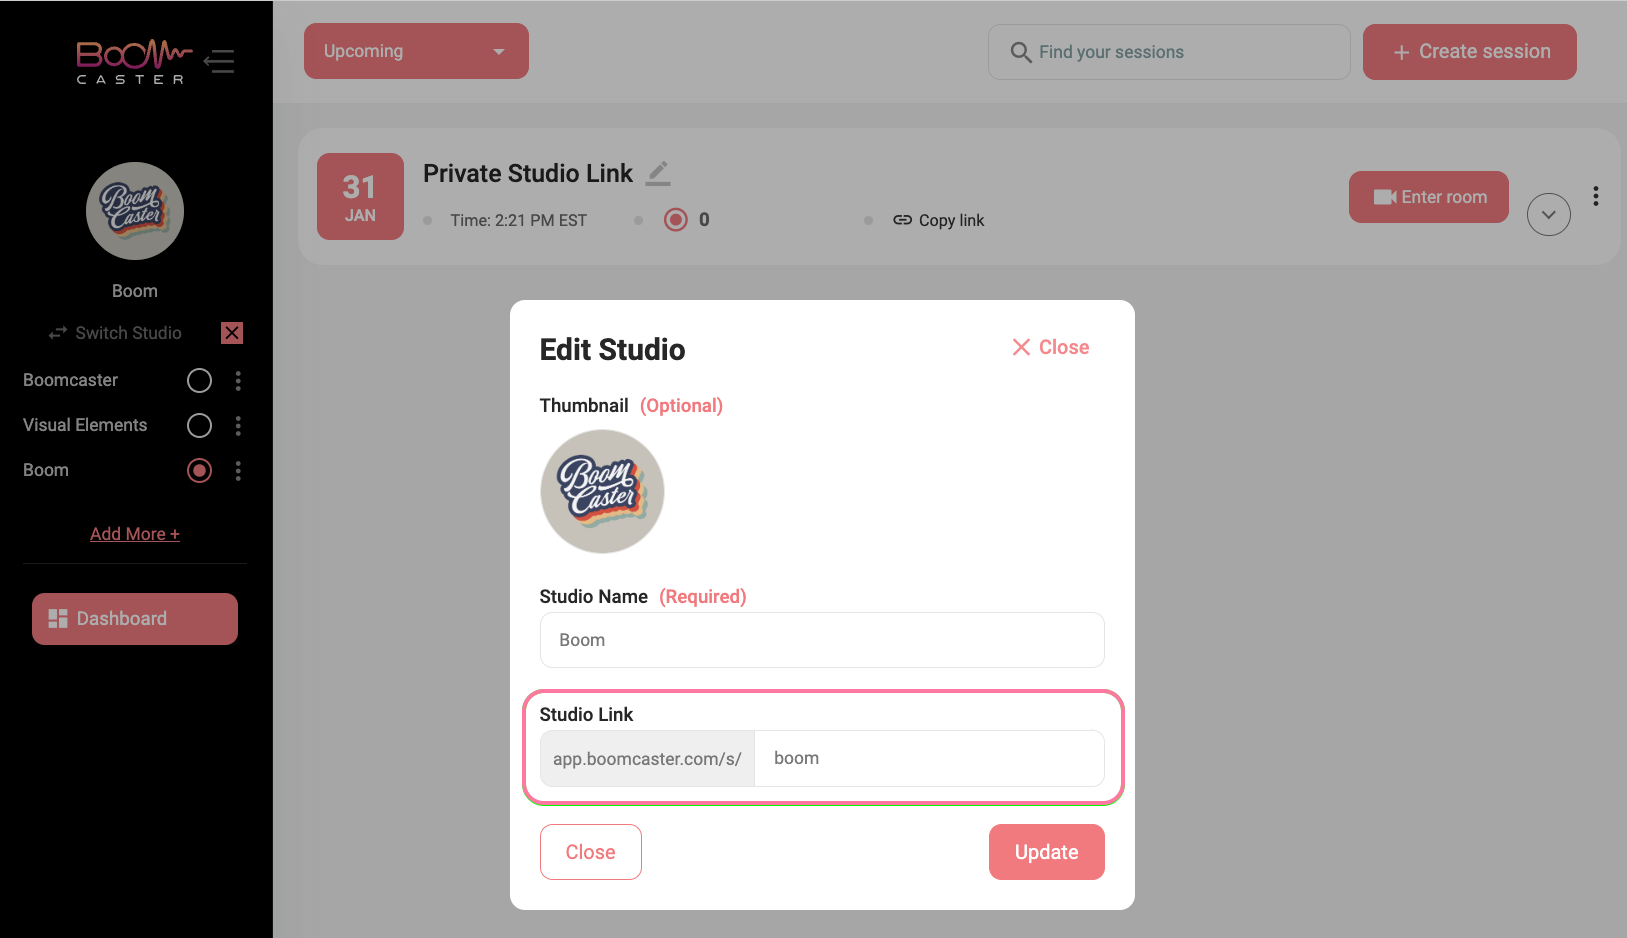
- Save your changes. Your Private Studio Link is now activated and ready to use!
Step 2: Share Your Private Studio Link
Once your private studio is activated:
- Copy the Private Studio Link and share it with your guests.
- You can also add the link to your scheduling software (e.g., Google Calendar, Calendly) for easy guest access.
Step 3: Access Your Private Studio as a Host
If you are logged into Boomcaster:
- Click Create Session on your dashboard.
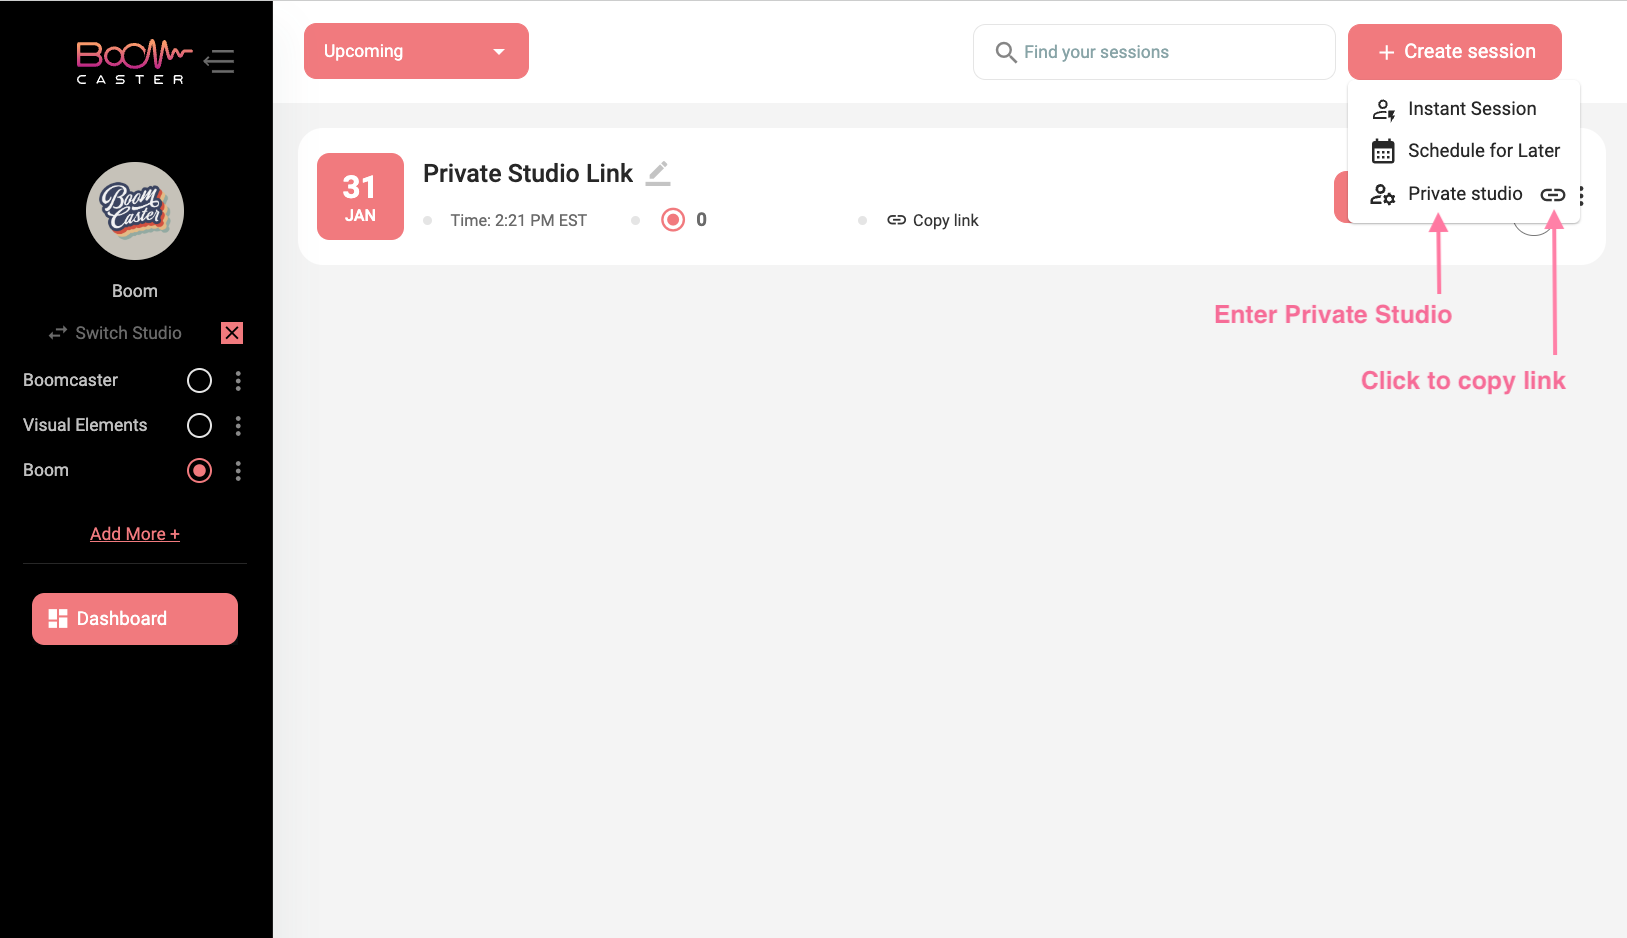
- Select Private Studio to enter your studio.
- Once inside, you can copy the link to share with your guests.
Step 4: Access Your Private Studio Without Logging In
If you are not already logged into Boomcaster:
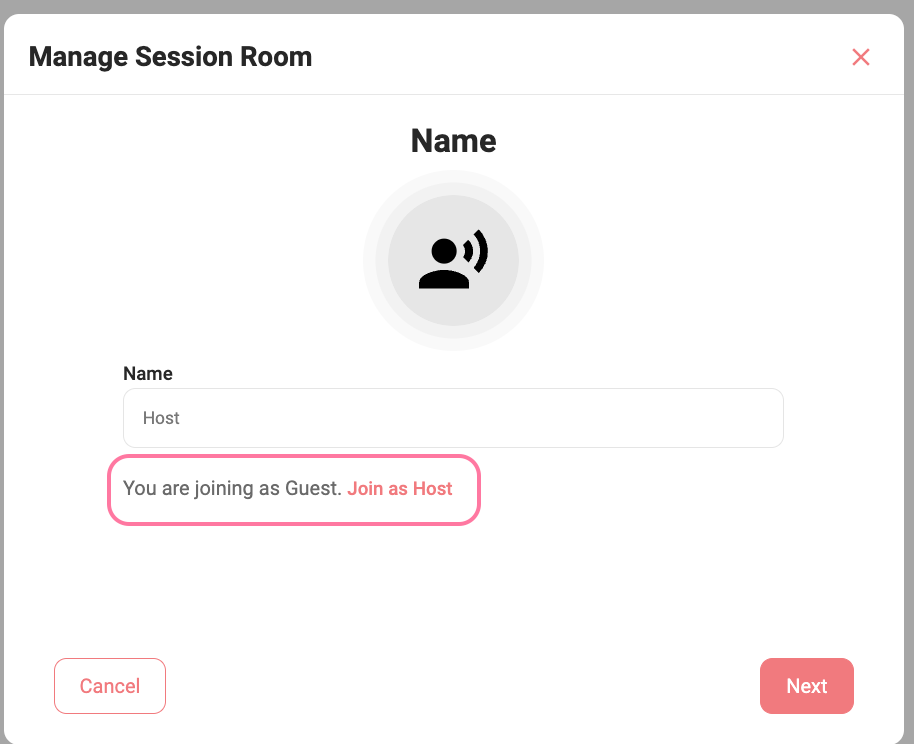
- Click the Private Studio Link.
- Select Join as Host to log in and enter your studio.
- You will be prompted to log in with your Boomcaster credentials.
Any sessions recorded with this link will appear in the dashboard for the respective studio, organized by date and time, along with the recordings.
